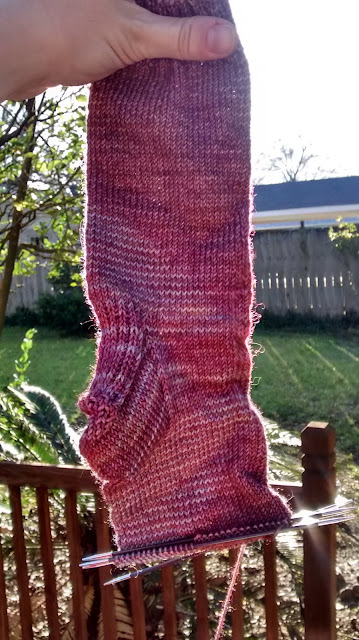
I realized the other day that I haven't finished a pair of socks in ages. I honestly don't even remember the last pair of socks I knitted. I have a sock going now- I use the term "going" loosely, because I knit a round or two on it like once or twice a week- but I feel no pressure to finish it. As I was outside on a sunny, 75* February day, I figured out why. We had no winter this year. I wore hand-knit socks like 4, maybe 5 times total. Most of my socks didn't even make it out of storage. As a knitter, this is sad. "Why even bother making socks anymore?" I asked myself. "I can't think of any reason to continue," I answered myself.
Plain vanilla sock, Knit Picks Hawthorne in the colorway Belmont that somehow jumped into my basket when I was ordering yarn for something else. Not sure why. It's sort of an odd color and the pooling is strange.
As sad as it is, I just don't see a point in devoting precious knitting time to making socks, unless it's a super cool pattern, or holiday specific. That would be ok. I've got my eye on Jellyfish, and someone gave me a skein of Halloween sock yarn that I'd like to knit up before next Halloween. But these plain vanilla socks just aren't cutting it right now. I'd rather knit sweaters that I can wear once a year. Logic! Mine is sound.
Friday, February 26, 2016
Thursday, February 18, 2016
Everett Henley Cardigan
Hello again! As a reminder, it's Everett Henley week over on the Holla Knits blog. Get this pattern for just $3 all week!
Modifying this pullover into a cardigan was actually quite easy. Almost any top-down sweater can be modified into a cardigan, provided the original design doesn't have some sort of front central panel. Vistoire, for example, would not work as a cardigan. But luckily, Everett does!
Here's what I did:
I followed the pattern up until the point when you cast on 4 and join to work in the round. I just didn't do that and kept working back and forth.
In hind sight, I would do things a little differently. I think I would have worked from the pattern until the front chart was complete, then I would have cast on 8 sts on each side of the front to add another lace repeat. That would make the neckline a little flatter across the very top. As is in my cardigan, the neckline is a little V-necky, but not really- it's sort of an odd shape. Casting on more stitches would make it a little more scoop necky.
Instead of the curved lower hem, I just did a couple inches of 2x2 ribbing.
Collar: I picked up about 2 stitches for every 3 rows along the neckline, then one stitch in every cast-on stitch. Couple of rows of 2x2 ribbing, done.
Button bands: Along the front edges, I picked up a multiple of 4 plus an extra 2 stitches, which worked out to be about 2 stitches for every 3 rows. I worked 2x2 ribbing, beginning and ending with 2 knit stitches. I did the button band first, then sewed the buttons on equally spaced, then I used the button locations to knit buttonholes on the buttonhole band.
And lastly, I wanted to share two finishing tips that have really made my handknits look much less "homemade."
For way more professional looking bind offs in the round, I always use method #3 from this TECHkitter tutorial. It's great for sleeve cuffs, the bottom edge of a top-down sweater, etc.
I recently discovered this tip from Ysolda about preventing "ears" when binding off, and I've been using it every time. Much, much better edges on things like the collar of my cardigan.
Modifying this pullover into a cardigan was actually quite easy. Almost any top-down sweater can be modified into a cardigan, provided the original design doesn't have some sort of front central panel. Vistoire, for example, would not work as a cardigan. But luckily, Everett does!
Here's what I did:
I followed the pattern up until the point when you cast on 4 and join to work in the round. I just didn't do that and kept working back and forth.
In hind sight, I would do things a little differently. I think I would have worked from the pattern until the front chart was complete, then I would have cast on 8 sts on each side of the front to add another lace repeat. That would make the neckline a little flatter across the very top. As is in my cardigan, the neckline is a little V-necky, but not really- it's sort of an odd shape. Casting on more stitches would make it a little more scoop necky.
Instead of the curved lower hem, I just did a couple inches of 2x2 ribbing.
Collar: I picked up about 2 stitches for every 3 rows along the neckline, then one stitch in every cast-on stitch. Couple of rows of 2x2 ribbing, done.
Button bands: Along the front edges, I picked up a multiple of 4 plus an extra 2 stitches, which worked out to be about 2 stitches for every 3 rows. I worked 2x2 ribbing, beginning and ending with 2 knit stitches. I did the button band first, then sewed the buttons on equally spaced, then I used the button locations to knit buttonholes on the buttonhole band.
For way more professional looking bind offs in the round, I always use method #3 from this TECHkitter tutorial. It's great for sleeve cuffs, the bottom edge of a top-down sweater, etc.
I recently discovered this tip from Ysolda about preventing "ears" when binding off, and I've been using it every time. Much, much better edges on things like the collar of my cardigan.
Subscribe to:
Comments (Atom)


